CAPTURE A PHOTOSHPERE
– To download the google street view app for iphone or android
1. In the google street view app take a new photosphere


1.5 Send the photosphere to your computer and open it in photoshop
After exporting, the photosphere will appear as an Equirectangular Projection. You can explore other Equirectangular Projections here.
EDIT OR MAKE YOUR OWN PHOTOSPHERE
Create an immersive photosphere environment from collaged elements. This can start with a google street view photosphere you have downloaded, other images you have found online, drawings you’ve done or a blank canvas.
1. Start with a blank canvas in photoshop that is 4,096 x 2,048 Pixels. This will serve as the base of your photosphere.
2. If you are working with a sourced equirectangular image, like a google street view photosphere, import this image.
3. Then go to 3D -> Spherical Panorama -> New panorama from selected layers. If your options in the 3D menu bar are all greyed out, you need to ‘Enable Open GL’ by going to Preferences -> Performance -> and ticking the ‘Use graphics Processor’ box . This will switch your photoshop workspace to a 3D workspace.


4. You will be able to click and drag around on your photosphere. Pull up the layers window ( which can be found under window -> layers) and double click on the Base Color “SphericalMap” to see and edit the equirectangular projection.

5. To add layers to your photosphere: Go back to the 3D tab and orient the view to the area you want to add new images on. Once the area you want to work with is in view, click Layers -> new layers. You can add to this layer the way you would to any photoshop document. Be sure not to move the panorama below it. Once you have added your content, select that layer only and go to Layer -> merge down.
6. When you are finished editing your photosphere, export it by going to 3D -> spherical panorama -> export panorama
SHARE YOUR PHOTOSPHERE
Make your photosphere public by uploading it to google street view!
Think about your photo sphere as a site specific work. You can upload photospheres to street view using the street view app.
Post your photosphere or panorama on the class blog.
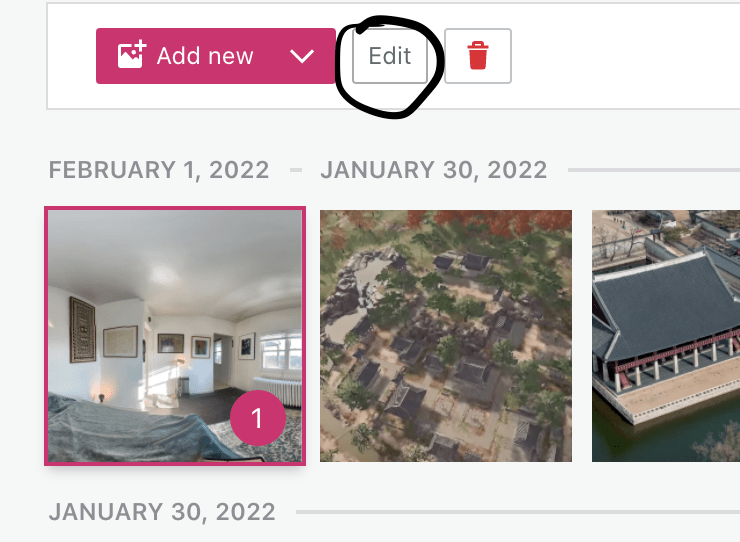
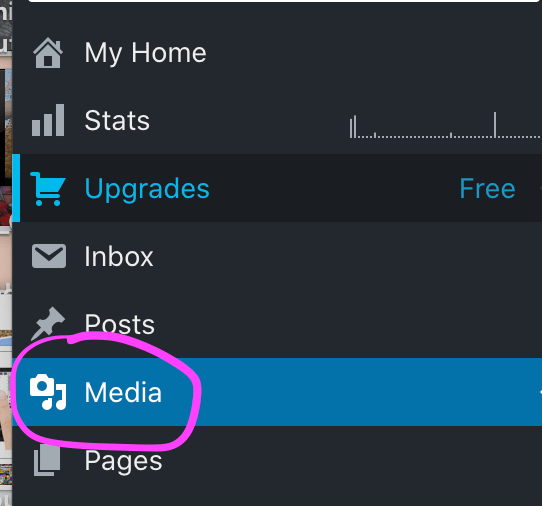
- Go to My Site → Site → Media and upload your 360° photo.
- Click on the photo once, then click Edit.
- Copy the URL:

- Copy that url to a text editor, or your notes
- Make your blog post for the project the way you usually would by going to Go to My Site → Site → Posts and clicking ‘Add new post’
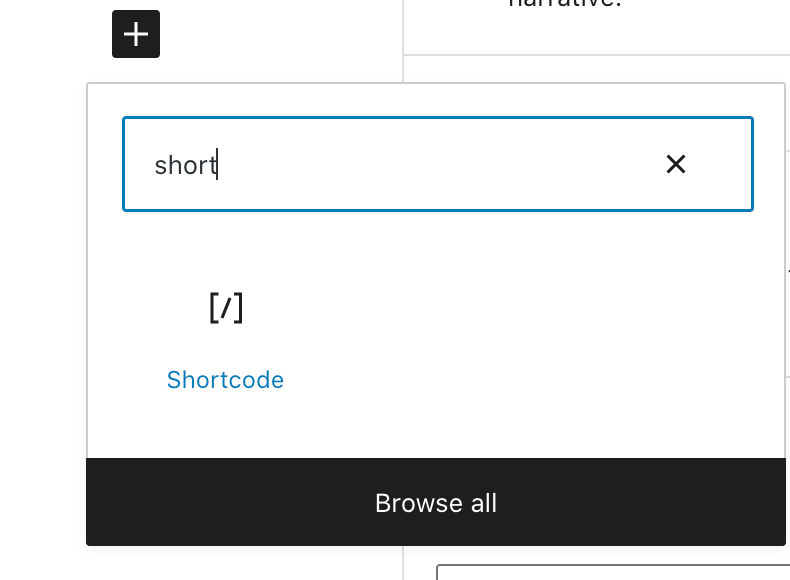
- Add the block for shortcodes by clicking on the black plus sign and searching for ‘shortcode’
- In the box where it says “add shortcode here” add the shortcode: below below but replace “
path-to-photo.jpg"with the URL you copied in Step 4.

- For panorama photos the shortcode requires a slightly different format:

- for more on how to embed photospheres and panoramas – click here

Leave a comment